Complete EROMMY Gazebo Instruction B0D5XWVD7Y: Assembly & Maintenance Guide

Introduction
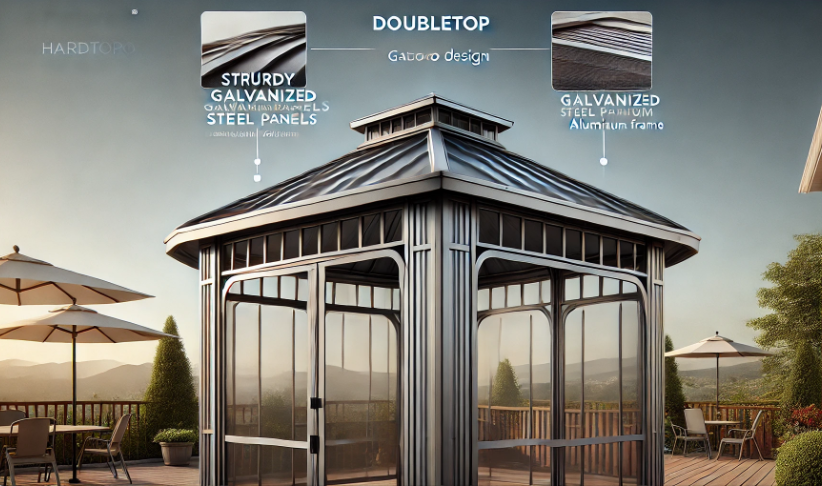
The EROMMY 12′ x 16′ Hardtop Gazebo, model B0D5XWVD7Y, is a stunning addition to any outdoor space. With its galvanized steel roof, powder-coated aluminum frame, and stylish double-roof design, it offers both functionality and elegance. Whether you’re creating a relaxing retreat or an entertainment hub, this guide provides everything you need for seamless assembly and ongoing care.
By following this detailed step-by-step guide, you’ll ensure safe and efficient assembly, along with tips to maintain the gazebo’s quality for years to come. Let’s dive into the EROMMY gazebo instruction B0D5XWVD7Y.
Pre-Assembly Information
Package Contents
Upon opening the package, verify that all parts and hardware are present. Here is a list of components typically included:
| Part | Quantity |
|---|---|
| Galvanized Steel Roof Panels | 12 |
| Aluminum Upright Posts | 4 |
| Roof Beams | 6 |
| Curtain Rods | 4 |
| Hardware Pack | 1 |
| Assembly Manual | 1 |
Each component is labeled for easy identification. Compare your parts with the detailed diagram provided in the manual to confirm accuracy.
Required Tools
You’ll need these tools:
- A step ladder
- Phillips screwdriver
- Adjustable wrench
- Safety gloves
Preparing these tools before assembly will save time.
Preparation Tips
- Location: Choose a flat, level surface with adequate overhead clearance.
- Ground Preparation: Ensure the ground is free of debris. For softer soil, anchor the gazebo with deeper stakes.
- Weather: Avoid assembling in windy or rainy conditions to ensure safety and accuracy.
Safety Precautions
To ensure safety during assembly, follow these guidelines:
- Wear gloves when handling metal parts to prevent cuts.
- Use two or more people to lift heavy components like roof panels and beams.
- Tighten screws incrementally to avoid uneven strain.
- Always secure the structure to the ground once assembly is complete.
Step-by-Step Assembly Instructions
Step 1: Assemble the Frame
Begin by assembling the aluminum upright posts. Align the base plates with the posts and secure them using the screws provided. Attach the connecting beams between the posts, ensuring all bolts are snug but not overtightened.
Step 2: Install the Roof Structure
Connect the roof beams to form the upper framework. Next, align and place the galvanized steel panels onto the beams, starting at the center and working outward. Use the washers and screws to securely fasten each panel.
Step 3: Add the Double Roof Feature
Attach the upper-tier framework on top of the main roof. This feature enhances ventilation and improves airflow within the gazebo. Secure this section with bolts, ensuring it is stable and evenly balanced.
Step 4: Attach Curtains and Netting
Insert the curtain rods into the designated slots on the posts. Once the rods are in place, hang the curtains and netting. These can be zipped closed for privacy or tied back for an open-air experience.
Step 5: Finalize and Anchor the Gazebo
Inspect the entire gazebo for loose bolts or uneven sections. Tighten all screws securely. Anchor the base plates to the ground using stakes or screws, depending on the surface.
Post-Assembly Considerations
Maintenance Tips
- Cleaning: Use mild soap and water to clean the frame and roof. Avoid abrasive cleaners.
- Rust Prevention: Check for scratches or rust on the galvanized panels and touch up with rust-resistant paint as needed.
- Netting and Curtains: Machine wash on a gentle cycle when dirty, and air dry.
Seasonal Care
- During winter, remove heavy snow from the roof using a soft brush.
- In areas prone to high winds, use additional anchors or remove the roof panels temporarily.
Troubleshooting
- Loose Connections: Tighten screws if components wobble.
- Roof Panel Leaks: Inspect seals and apply waterproof adhesive if needed.
Additional Resources
- Assembly Videos: Visit EROMMY’s Official YouTube Channel for visual guidance.
- Customer Support: Reach out via erommy.com for help or to order replacement parts.
Frequently Asked Questions (FAQs)
What is the weight capacity of the roof?
The roof can withstand moderate snow loads; however, excess accumulation should be removed promptly.
How many people are required for assembly?
At least two people are recommended for safe assembly.
Can I paint the frame a different color?
While possible, it voids the warranty. Use weather-resistant paint if proceeding.
How do I replace damaged roof panels?
Replacement panels are available through the manufacturer. Contact their support for compatible parts.
Is the gazebo moveable after assembly?
Yes, but disassemble the roof panels first to prevent structural damage.
Conclusion
The EROMMY 12′ x 16′ Hardtop Gazebo, model B0D5XWVD7Y, is an elegant and durable addition to your outdoor space. With detailed assembly instructions, maintenance tips, and troubleshooting advice, this guide ensures that your gazebo remains a centerpiece of your backyard for years. If questions arise, don’t hesitate to consult the FAQ or reach out for expert assistance.
Additional FAQs On EROMMY Gazebo Instruction B0D5XWVD7Y:
Can the gazebo be assembled on a concrete patio or deck?
Yes, it can. Use heavy-duty expansion bolts or similar anchors for stability.
What is the estimated time for a two-person assembly?
On average, it takes 4-6 hours, depending on experience and tool readiness.
Are there UV protection properties for the roof?
The galvanized steel panels provide excellent UV protection, shielding you from harmful rays.
Can the gazebo withstand strong coastal winds?
While the gazebo is sturdy, additional tie-downs or ground anchors are advised for areas with high winds.
What is the warranty period for this gazebo?
The warranty typically lasts for one year, covering defects in materials or workmanship. Always check the product details for specific terms.
Recommended Articles:
Ultimate Guide to the Paccar 577.59507OE Air Brake Pressure Sensor
OTR Replacement 005 Squeeze Mop Nib: Comprehensive Guide
The Comprehensive Guide to CS 68-HV: Features, Benefits, and Applications
Complete Guide to the Baimoqi Car Digital Clock: Features, Setup, and FAQs
Complete EROMMY Gazebo Instruction B0D5XWVD7Y: Assembly & Maintenance Guide


Post Comment